Zigzag crochet Pattern
By Laurain Crochet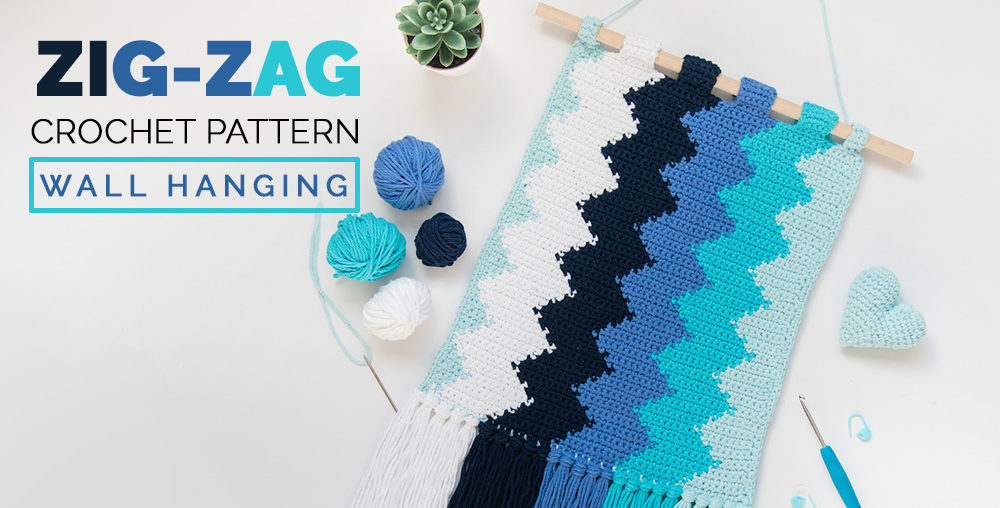
Hello!! Welcome to this blog where you can find this beautiful zigzag crochet pattern for free. It is great for practice crochet if you are a beginner, and it will look amazing in your home. Enjoy!!
Materials and Tools:
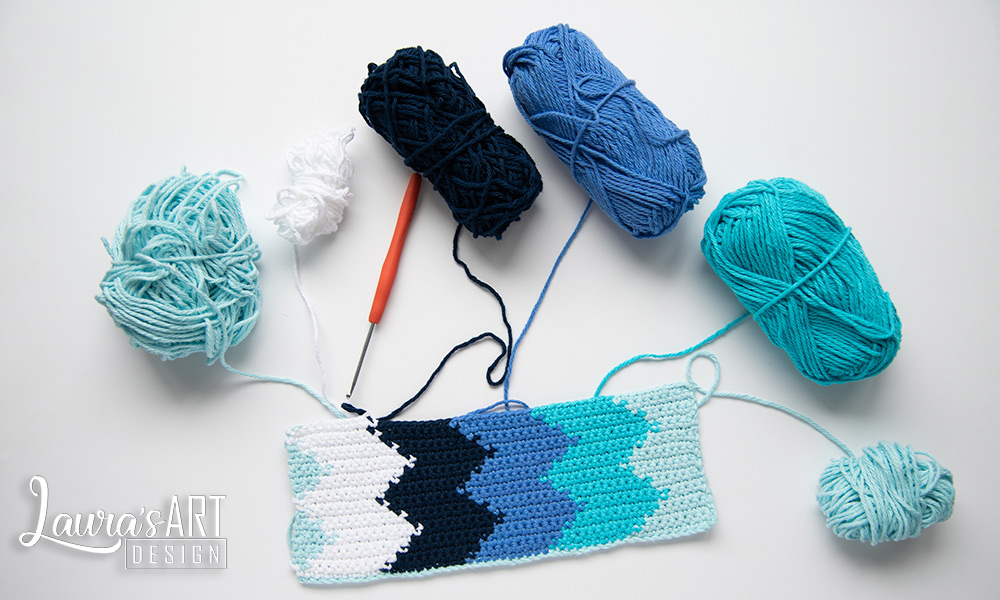
- 5 balls of medium size cotton yarn (4), which is to be knitted with a 4.5 mm hook.
- Hook or crochet of 3 or 3.5 mm.
- Sewing needle.
- Wooden stick.
- Scissors.
Abbreviations:
- ch – chain
- sc – single crochet
- hdc – half double crochet
- dc – double crochet
- sl st – slip stitch
¡¡¡Hola a todos!!! Bienvenidos a este blog en donde encontrarás este hermoso patrón en zigzag gratuito. Si eres principiante, este patrón es genial para practicar el tejido con gancho o ganchillo. ¡Que lo disfrutes!
Materiales:
- 5 madejas u ovillos de hilo de algodón de tamaño medio (4), que sea para tejer con gancho de 4.5 mm.
- Gancho o ganchillo de 3 o 3.5 mm.
- Aguja lanera.
- Palito de madera.
- Tijeras.
Abreviaciones:
- ch – cadena
- sc – punto bajo o medio punto
- hdc – medio punto alto o media vareta.
- dc – punto alto o vareta.
- sl st – punto deslizado.
Notes:
- The wall hanging is worked in rows.
- The wall hanging is worked from the bottom up.
- The 1st st of each row should be placed into the second stitch as the turning chain.
- The turning chain will count as the 1st stitch of the row.
- The wall hanging is worked in single crochet.
Notas:
- Este tapiz decorativo se trabaja por filas.
- El tapiz se trabaja de abajo hacia arriba.
- El primer punto de cada fila se debe colocar en el segundo punto, después de haber volteado el tejido.
- La cadena que se teje al final para girar el tejido, se cuenta como primer punto de la fila.
- El tapiz está tejido en puntos bajos.
Instructions:
Instrucciones:
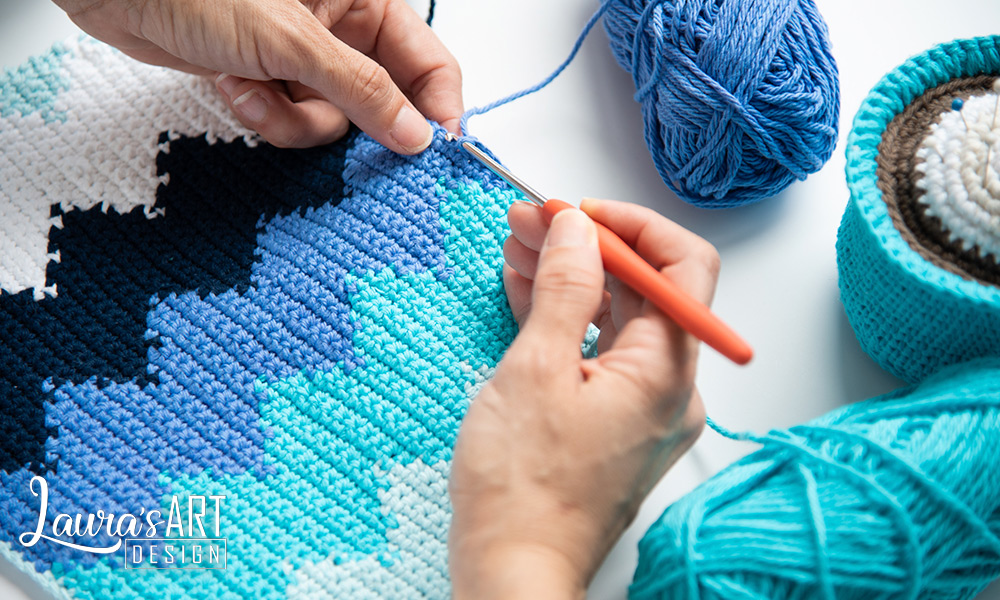
This design is made with the “Intarsia Crochet” technique, which consists of keeping the threads, without cutting, while the coloured sections are woven. If you want to know how to knit with this technique, click here to see an example.
You will start by making a chain of 50 stitches, plus an additional chain to give height to the next round, that is, the chain will be 51 and at the beginning of the next round you will begin to work in the second stitch from the hook.
You can make the chain in the colour you want, at the end it will be covered with the fringes that we will put on.
Este diseño se teje con la técnica “Intarsia Crochet”que consiste en mantener los hilos, sin cortar, mientras se van tejiendo las secciones de color. Si deseas saber como se teje con esta técnica da clic aquí para ver un ejemplo.
Comenzarás haciendo una cadena de 50 puntos, más una cadena adicional para dar altura a la siguiente vuelta, es decir, la cadena te quedará de 51 y al comenzar la siguiente vuelta empezarás a trabajar en el segundo punto a partir del gancho o gachillo.
La cadena la puedes hacer en el color que desees, al final se tapará con los flecos que pondremos.
Remember that you always end up with 1 chain. This chain at the end of a row/round is not counted as a stitch for the final count of stitches in a row.
When you see ch 1 at the end
of the row, start the next row beginning from 2nd st from the hook.
In This scheme below, if it tells you to make 8 stitches (once you have turned your work) it means that you will do 8 st from the second stitch.
Recuerda que siempre terminas con una cadena y al dar vuelta al tejido, esa cadena cuenta ya como un punto, así que empezarás a tejer en el segundo punto a partir de donde está el gancho. Este esquema a continuación, si te dice tejer 8 puntos (una vez que diste vuelta al tejido) significa que son 8 a partir del segundo punto, o tu primer punto de fila que empieza en el punto no. 2, según lo que comenté al principio.
- ch 50 and 1 more chain at the end (total 51 ch). / Comienza haciendo 50 cadenas y una más al final para dar altura, serán 51 y comenzarás a trabajar en la segunda cadena a partir del gancho lo siguiente:
- Row / fila 1: 9 sc , 10 sc, 10 sc, 10 sc, 10 sc, 1 ch (and turn / dar vuelta al tejido)
- Row / fila 2: 10 sc, 10 sc, 10 sc, 10 sc, 9 sc, 1 ch (and turn / dar vuelta al tejido)
- Row / fila 3: 7 sc, 10 sc, 10 sc, 10 sc, 10 sc, 2 sc, 1 ch (and turn / dar vuelta al tejido)
- Row / Fila 4: 2 sc, 10 sc, 10 sc, 10 sc, 10 sc, 7 sc, 1 ch (and turn / dar vuelta al tejido)
- Row / fila 5: 5 sc, 10 sc, 10 sc, 10 sc, 10 sc, 4 sc, 1 ch, (and turn / dar vuelta al tejido)
- Row / fila 6: 4 sc, 10 sc, 10 sc, 10 sc, 10 sc, 5 sc, 1 ch, (and turn / dar vuelta al tejido)
- Row / fila 7: 5 sc, 10 sc, 10 sc, 10 sc, 10 sc, 4 sc, 1 ch, (and turn / dar vuelta al tejido)
- Row / fila 8: 2 sc, 10 sc, 10 sc, 10 sc, 10 sc, 7 sc, 1 ch, (and turn / dar vuelta al tejido)
- Row / fila 9: 7 sc, 10sc, 10 sc, 10 sc, 10 sc, 2 sc, 1 ch, (and turn / dar vuelta al tejido)
- Row / fila 10: 10 sc, 10 sc, 10 sc, 10 sc, 9 sc, 1 ch (and turn / dar vuelta al tejido).
Repeat this pattern as many times as you want. In the sample image it was repeated 6 and a half times.
Repetir este patrón cuantas veces se desee. En la imagen de muestra se repitió 6 veces y media.
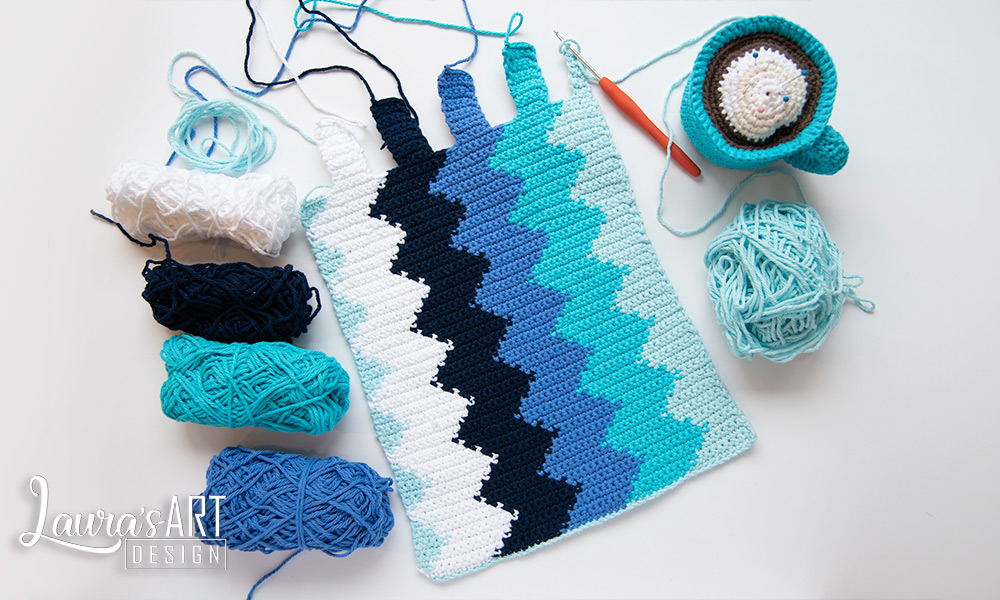
To make the straps, continue knitting 6 stitches back and forth in the respective colour and make 10 rows. These 6 stitches are worked from the 3rd to the 8th stitch, to leave 2 free stitches at the beginning and at the end of each colour and the separation can be seen. In the corner colours, make 3 stitches back and forth, starting from the beginning. When finished, put the stick and sew to close the strip.
Para hacer los tirantes, continuar tejiendo, en el respectivo color, 6 puntos en ida y vuelta y hacer 10 filas. Estos 6 puntos se tejen del 3er al 8vo punto, para dejar libres 2 puntos al principio y al final de cada color y se vea la separación. En los colores de la esquina, hacer 3 puntos en ida y vuelta, comenzando desde el principio. Al terminar poner el palito y coser para cerrar la tira.
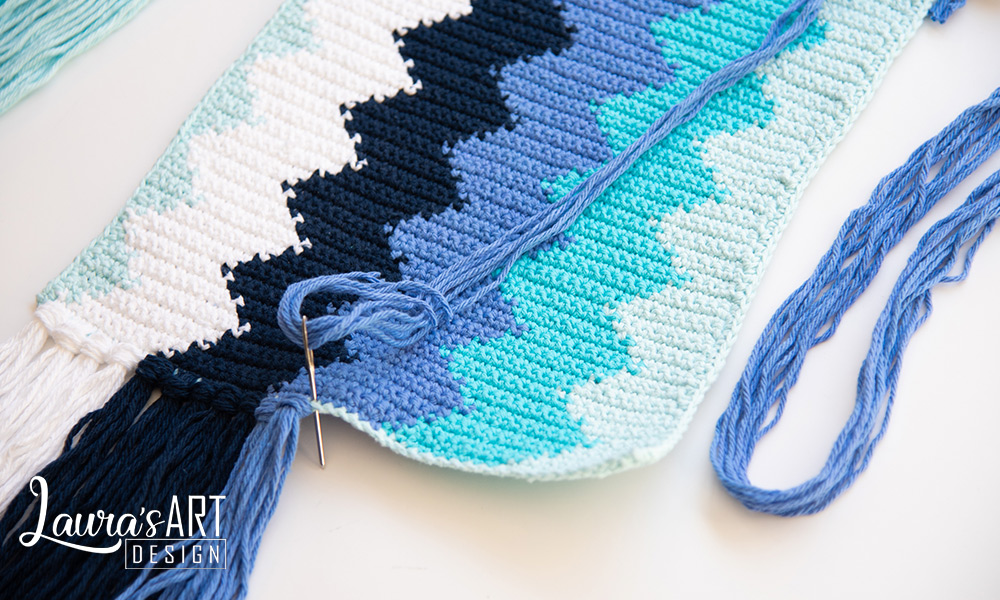
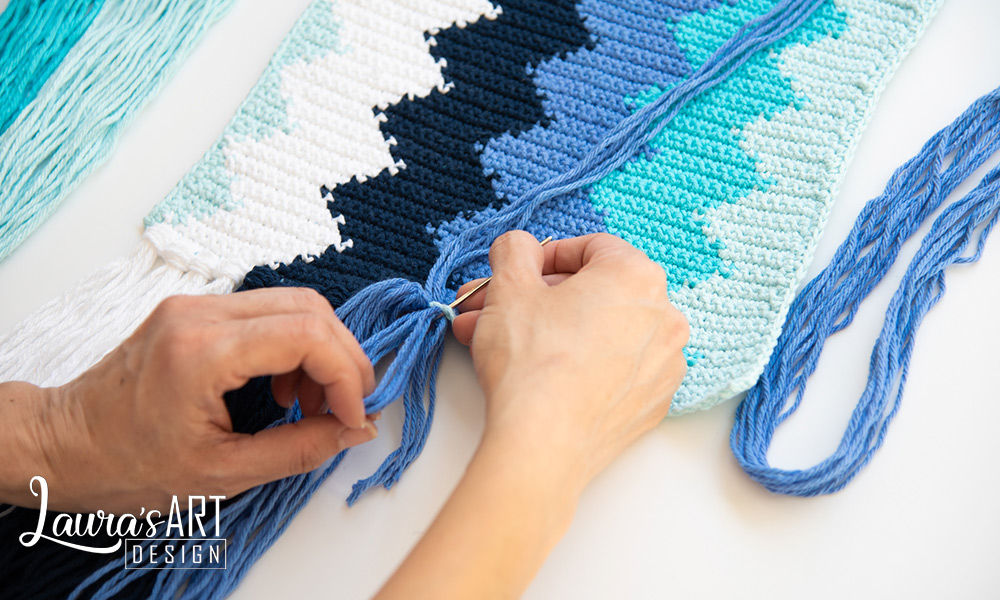
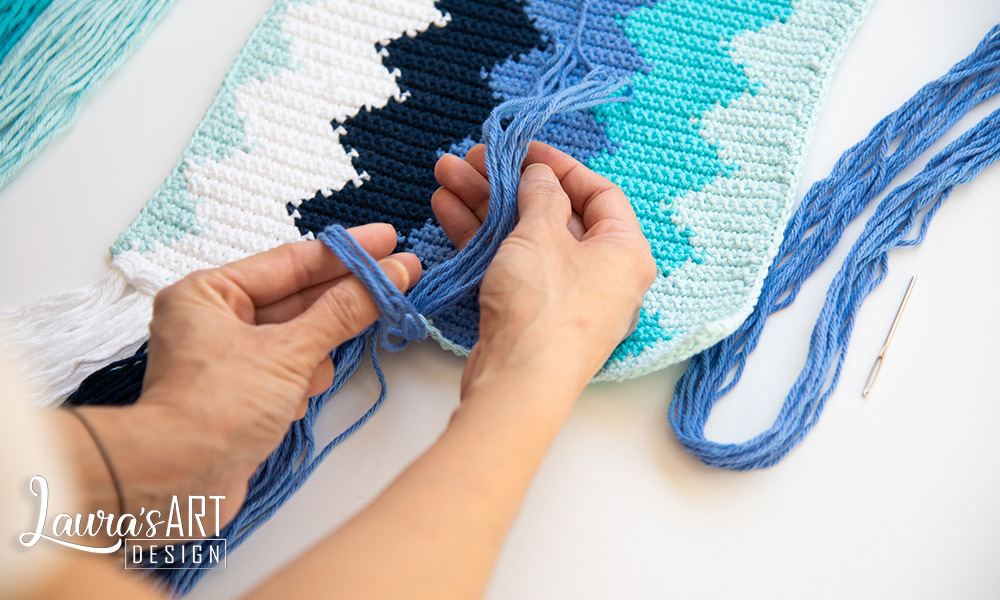
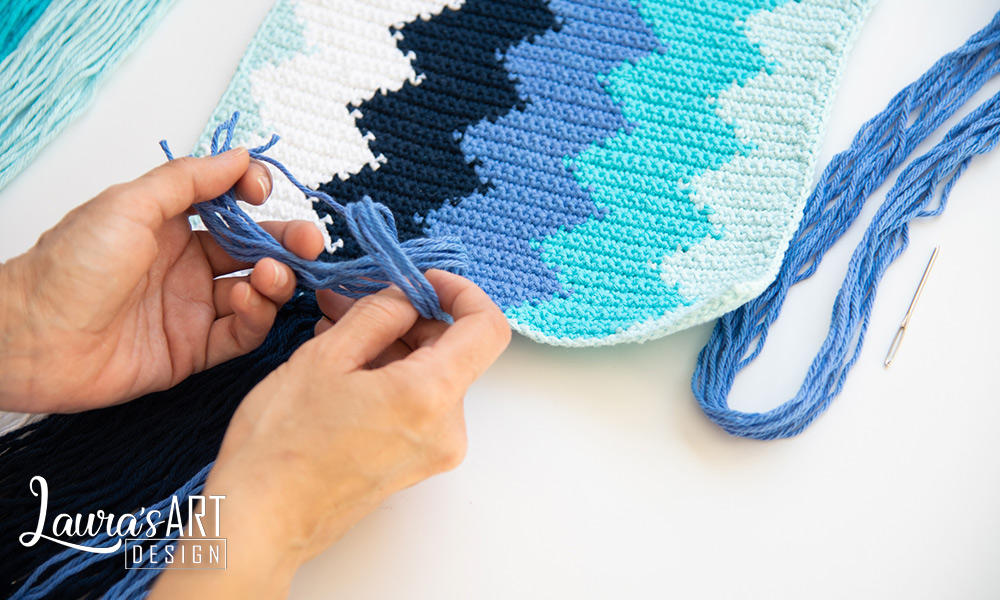
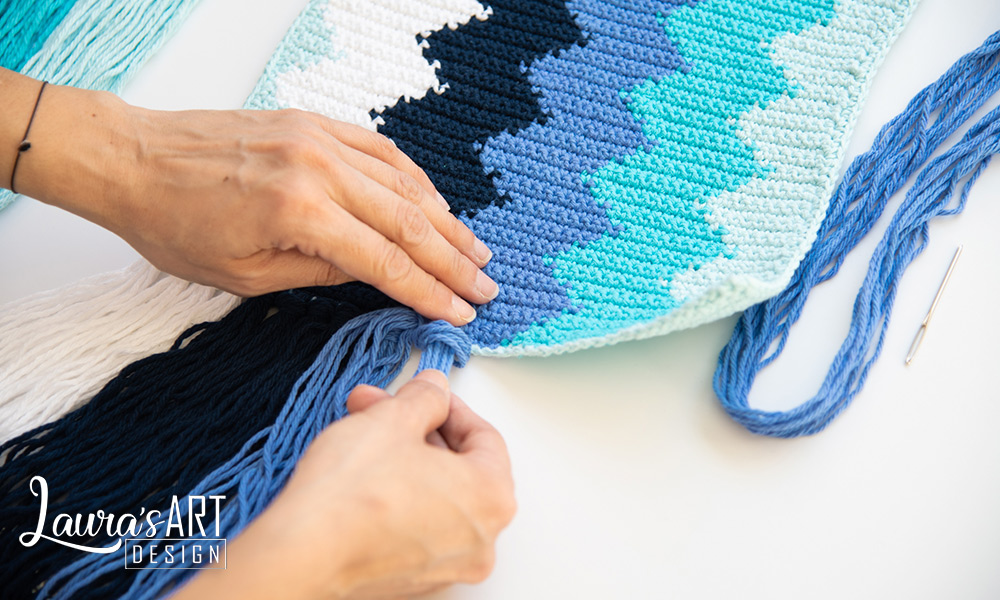
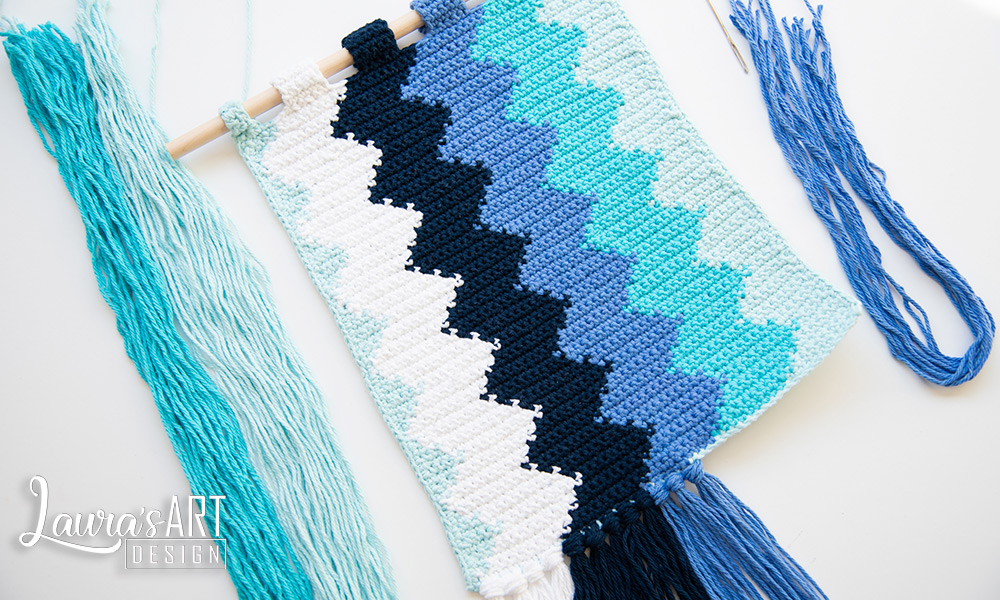
To make the fringes, with the help of a sewing needle, thread 5 strips and pass them from front to back in the first base chain, and from back to front in the second chain, (you will form a u) then, pass all the threads inside that u and pull.
Para hacer los flecos, con ayuda de una aguja lanera, enhebrar 5 tiras de hilo, pasarlas de adelante hacia atrás en la primera cadena de base, y de atrás hacia adelante en la segunda cadena, para que nos quede una especie de u en la parte de abajo, después, pasar por dentro de esa u todos los hilos y jalar.
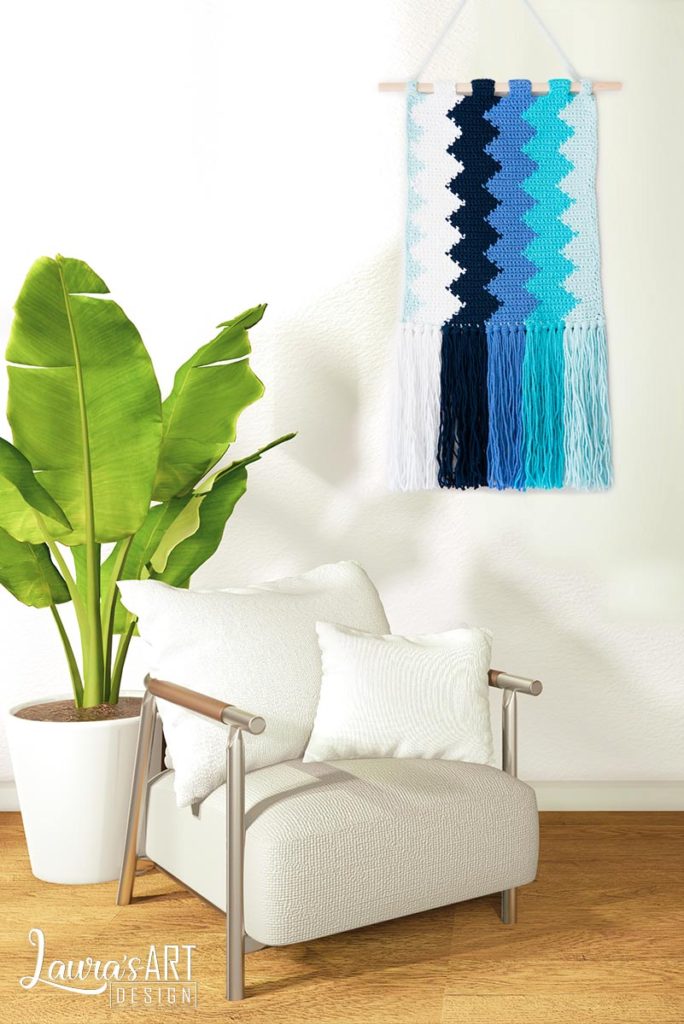
Finished!!! I hope you enjoyed making this beautiful crochet wall hanging and don’t forget to share it with us on instagram @laurasartdesign
¡¡¡Listo!!! Has terminado. Espero que hayas disfrutado muchísimo hacer este tapiz en gancho y no olvides compartirlo con nosotros en instagram @laurasartdesign
Don’t forget to follow us on our social media networks and subscribe to our newsletter to receive new patterns, promotions and more … Thank you for visiting us at Laura’s Art Design
No olvides seguirnos en nuestras redes y suscribirte a nuestro newsletter, donde te enviaremos nuevos patrones, promociones y más… Gracias por visitarnos en Laura’s Art Design