Crochet Winter Hat "Candy" - Tapestry Technique
By Laurain Christmas, Crochet, Winter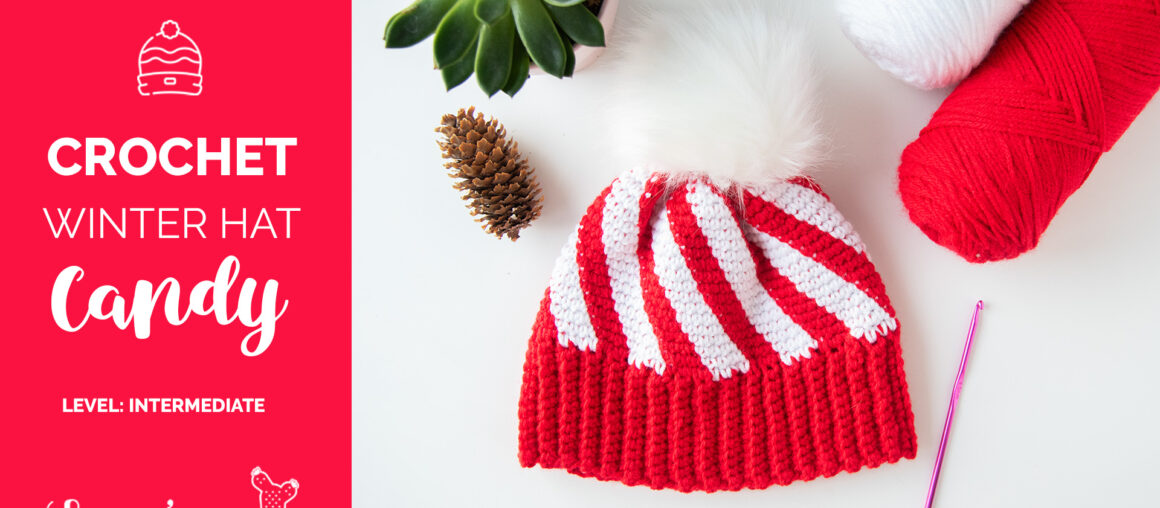
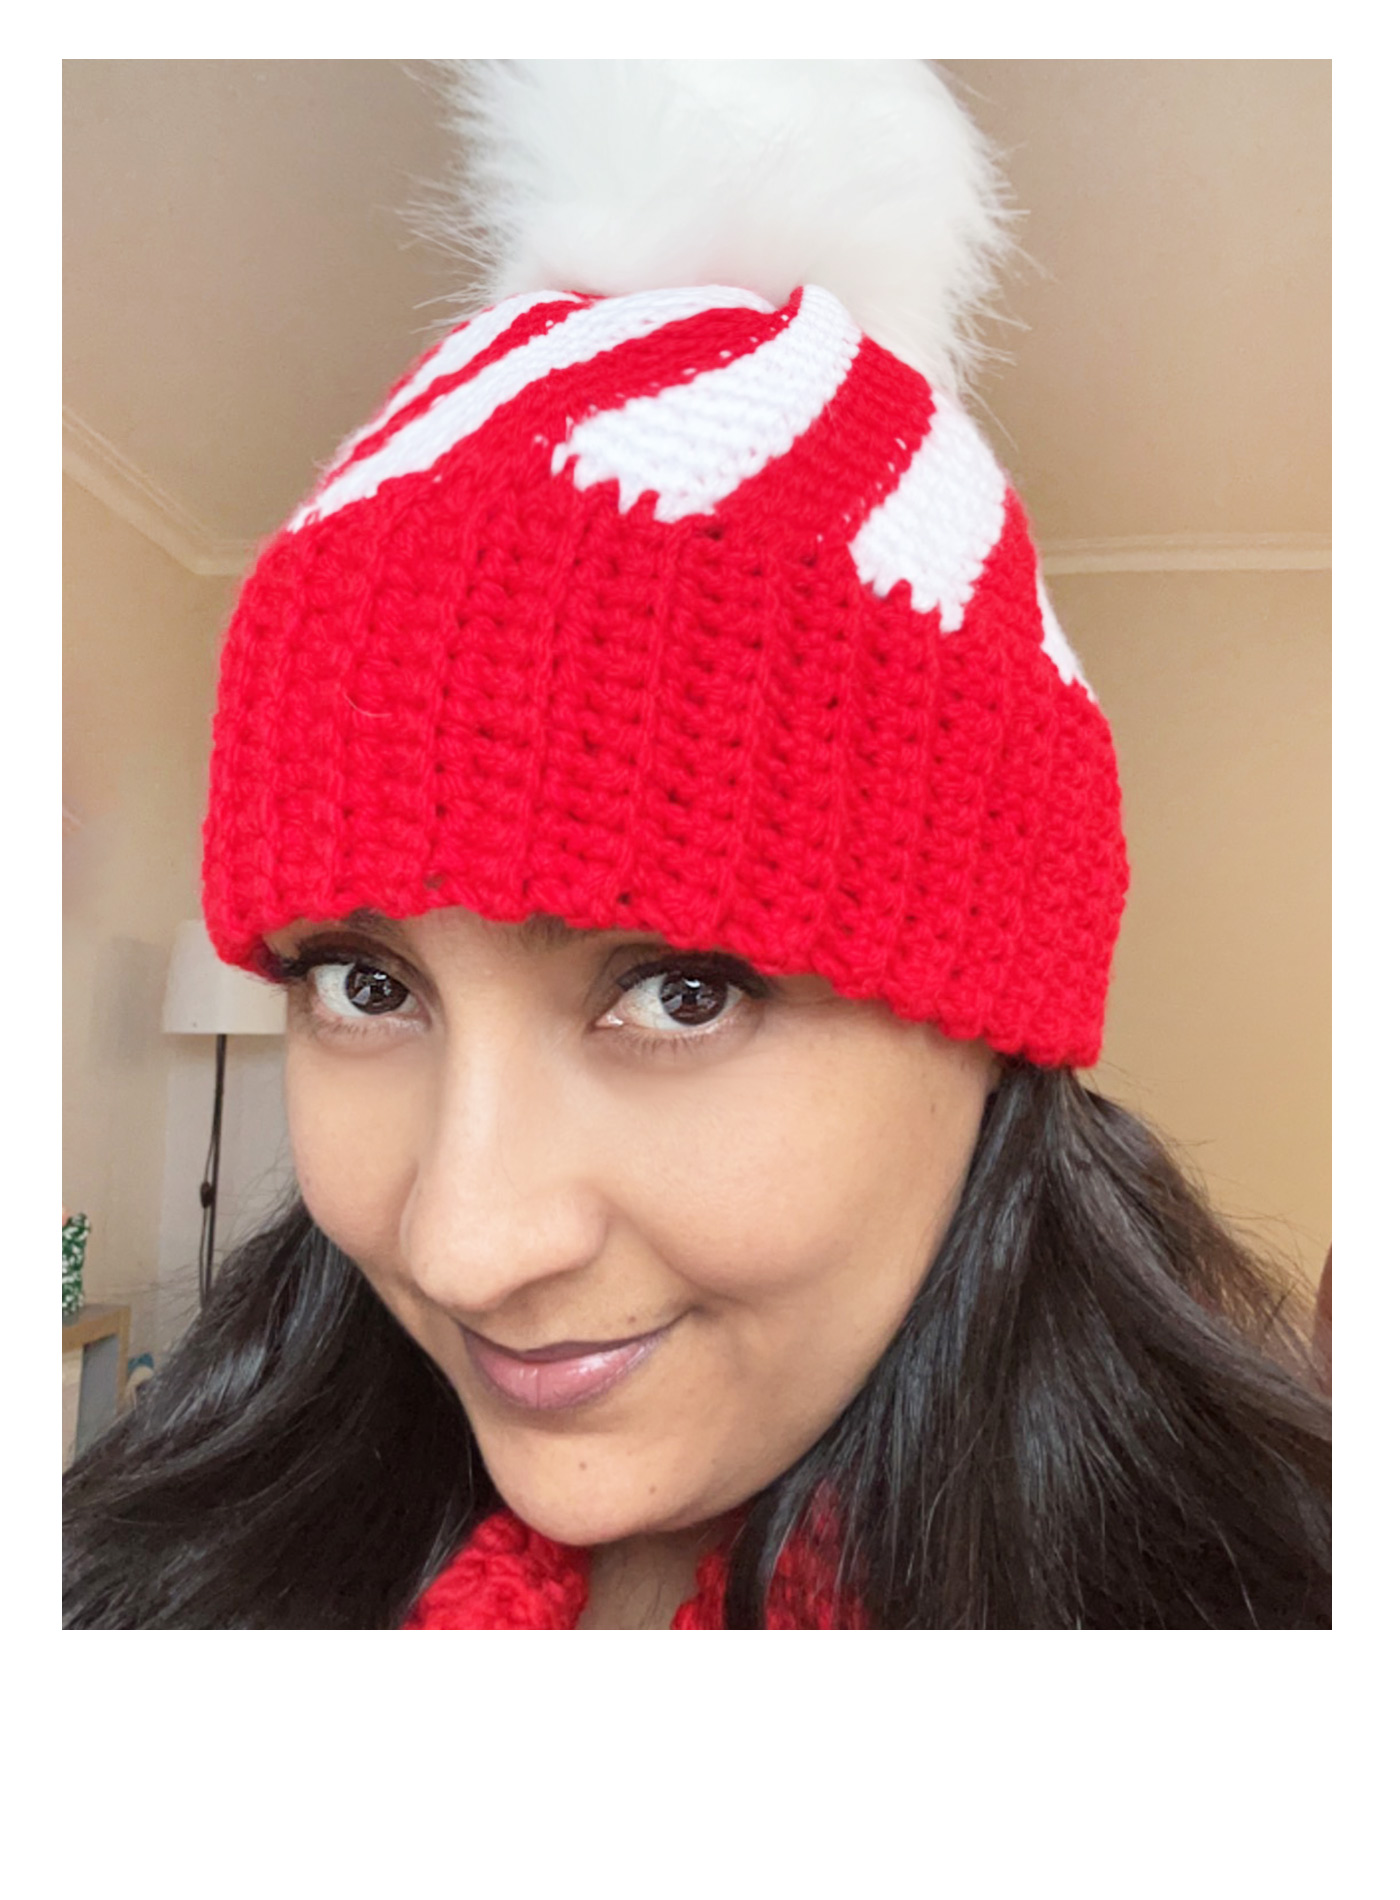
Hello and welcome to my blog once again. This time I bring you this tutorial to make a winter hat in the shape of a candy, that is to say, with 2 intertwined colours that look like a candy, don’t you think?
The interesting thing about this beanie is that we will be using the “Tapestry” crochet technique, which means that we will be working with 2 strands of yarn of different colours at the same time, in order to achieve this sweet effect.
This project is Intermediate! However, if you are a beginner, I invite you to try it as I explain in detail how to do the different stitches, as well as the colour changes, so you will probably be able to do it.
And without further ado, let’s get started!
Materials
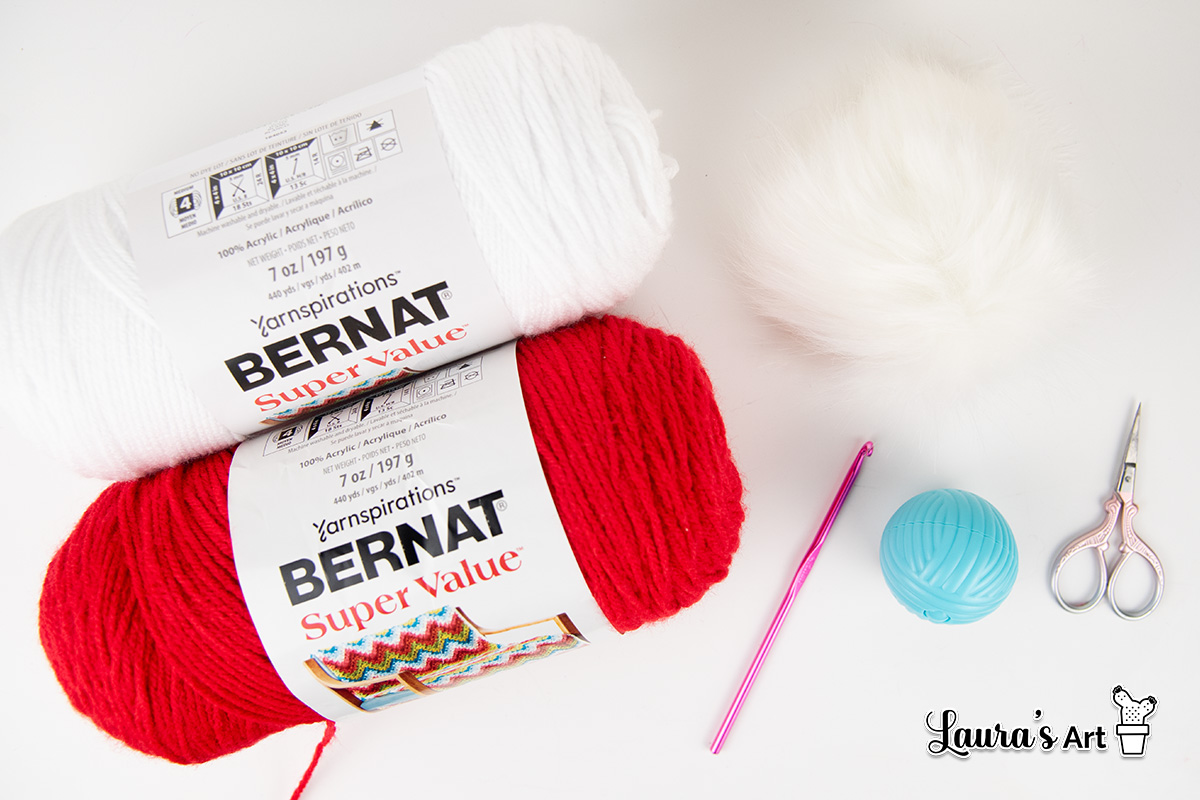
- Pom Pom. Find here the Faux fur Pom Pom that I’ve used. I got it on Amazon, and it is a package that has 6 pom pons, and by the price, I think it’s a great option, plus we have more pom pons so we can make more hats!
- Acrylic Yarn Medium (4). For this project, I’m using Bernat Super Value , Berry and White, but you can go with any other acrylic medium yarn like Lion Brand Yarn Pound of Love , Caron Simply Soft Solids Yarn , or Red Heart Super Saver Economy Yarn .
- You will need a 4.5 mm crochet hook. Here are some of my favourite hooks, in case you want to try them out! My first crochet hook set The basics My favourites Clover!
- Scissors
- Darning Needle
- Measuring tape
Abbreviations
- Ch – Chain
- SC – Single Crochet
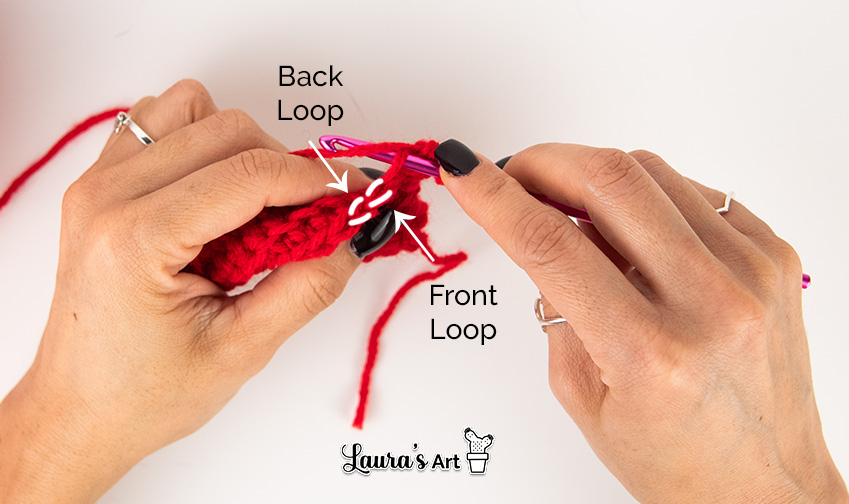
- Back loop – This means that only the back strand of the stitch is used to make the stitch (single crochet).
- FO – Fasten off.
Ok, the first thing to do is to take your tape measure and put it around your head. Normally the circumference of your head will be around 21 inches or 53 cm. A little more or a little less, so it’s important to know this number. In my case, it was 21 inches (51 cm).
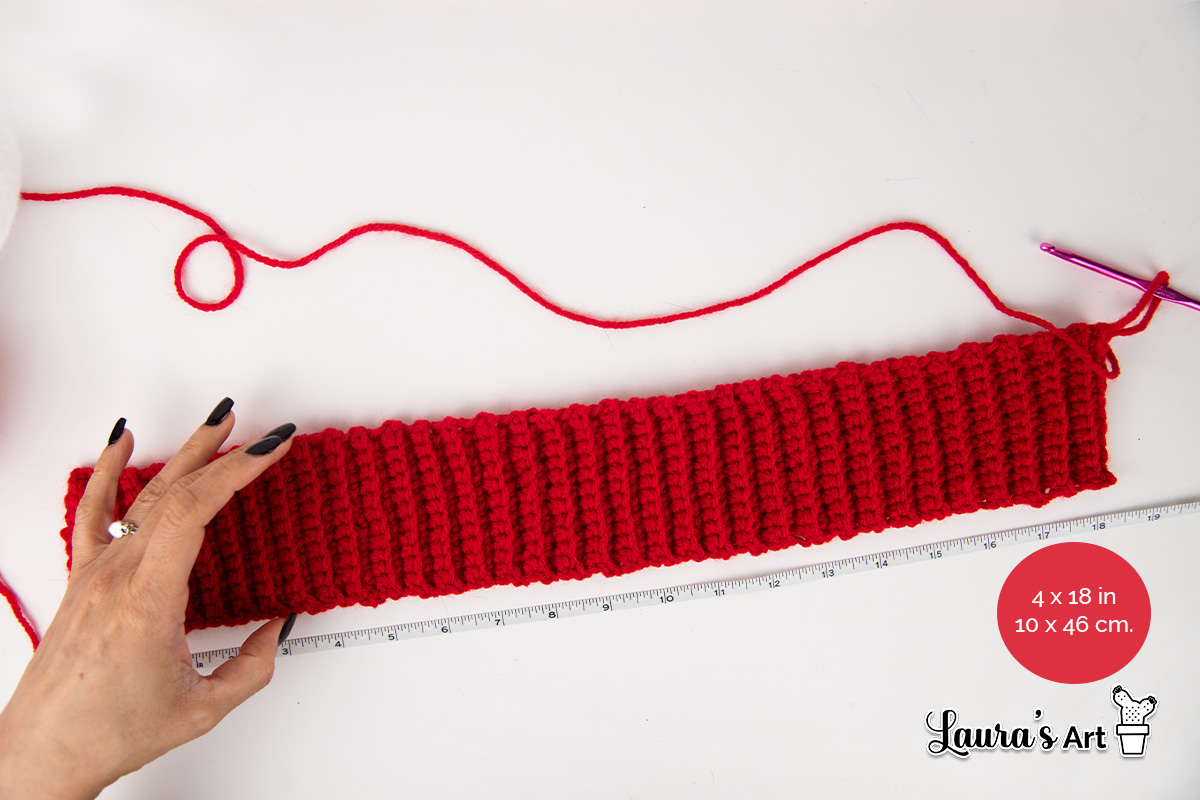
Now that we have this information, let’s decide the height of our ribbing. In my case I wanted it to be 10 cm, for which I need to make 12 single crochet stitches. These values can vary according to your taste. For example, if you want the ribbing to fold, you can make it longer (for example 24 sts), but for this tutorial, we’ll go with these values.
All right, let’s get started!
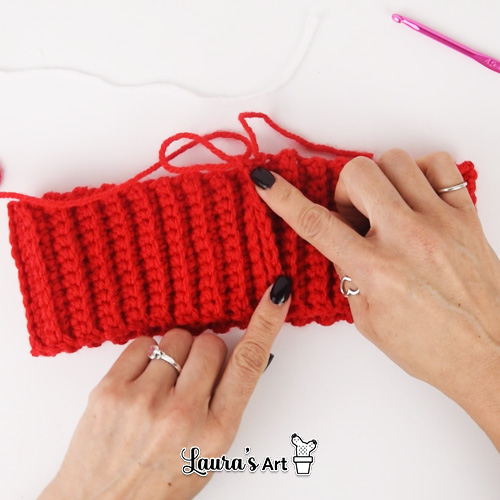
Ribbing
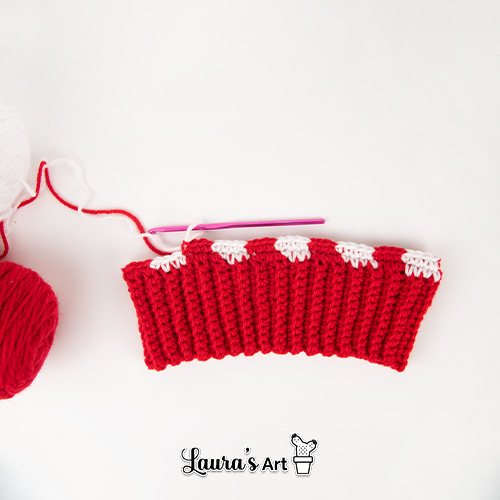
- Start by making 13 chains. From the second chain of the hook, make 12 sc. Always make 1 chain and turn at the end of each row.
- Work 12 sc in the back loop.
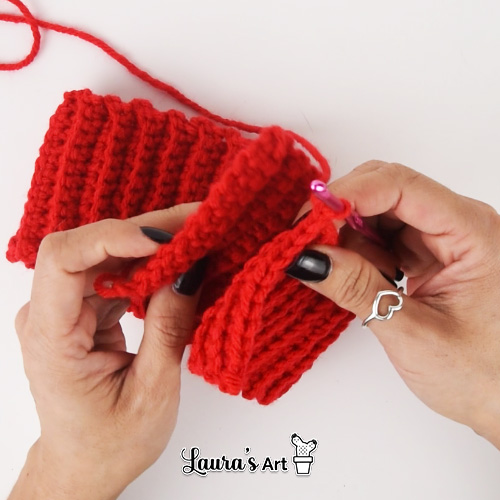
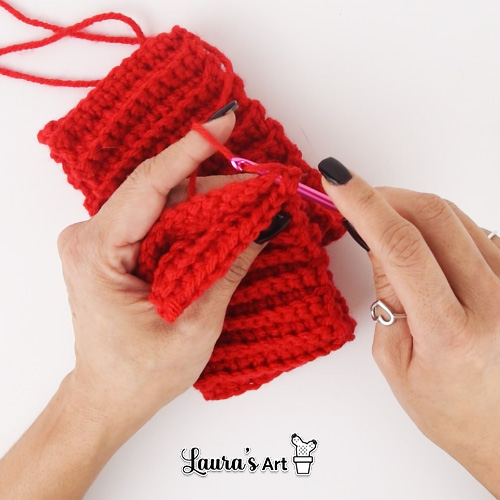
Repeat row 2 until your piece measures 18 inches or 46 cm. I ended up with 68 rows. Once you have finished 68 rows, make a chain, turn your ribbing, and join it with the first row, to close the band. From now on we will work in rounds.
Important! For the design to succeed, the number of rows you make has to be a multiple of 4, in my case it is 68. If you have to modify the numbers to fit your measurements, add or delete 4 rows, to keep the rows in a multiple of 4.
Once we have joined and closed the ribbing, we ch 1, add the white yarn and start to make the sc. I suggest you watch the video for a better explanation of this process.
You are going to crochet 4 red sc and 4 white sc and you are going to work in rounds,(you are not going to finish the rows) and you are going to continue until the hat measures about 8 inches or 21 cm, or if you want a taller hat you can crochet a few more rows. Your first stitch on row 2, which is white, should be made in the first red stitch you made on row 1 so that we get the “candy” effect.
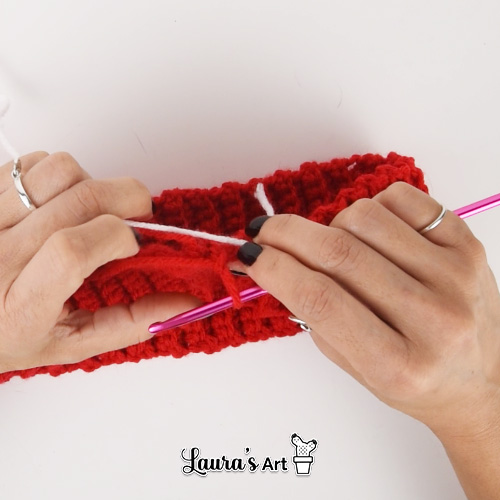
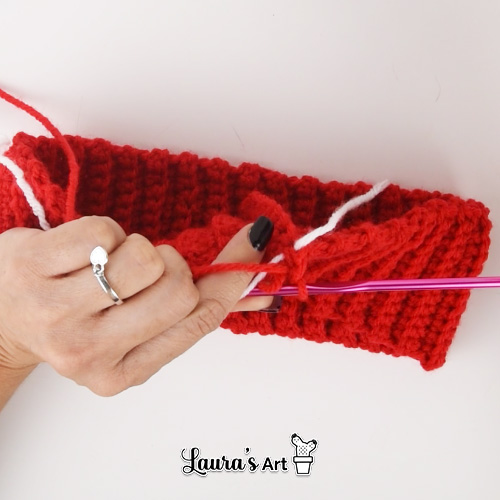
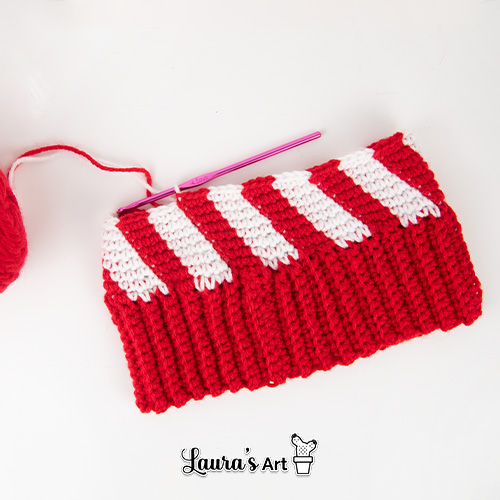
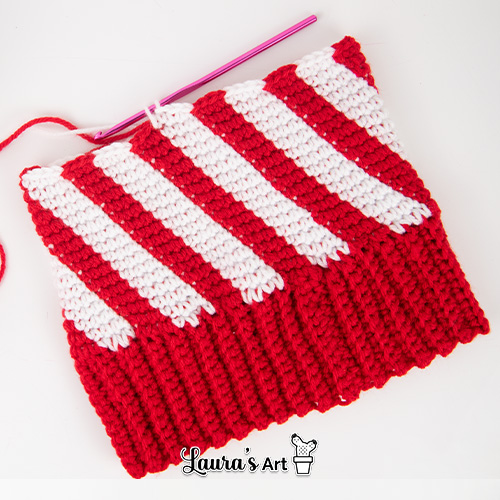
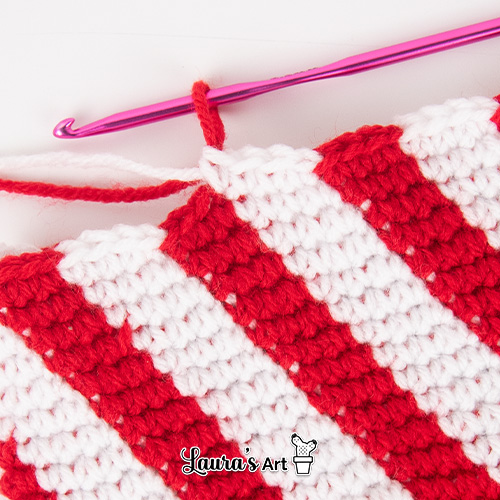
When you make your sets of 4, the last stitch you are making, in this example the white stitch, is made in the first red stitch of the previous row, so when you make your 4 stitches in red, the last stitch will be made in the white stitch of the previous row.
I recommend you watch the tutorial on YouTube to see how to do this step.
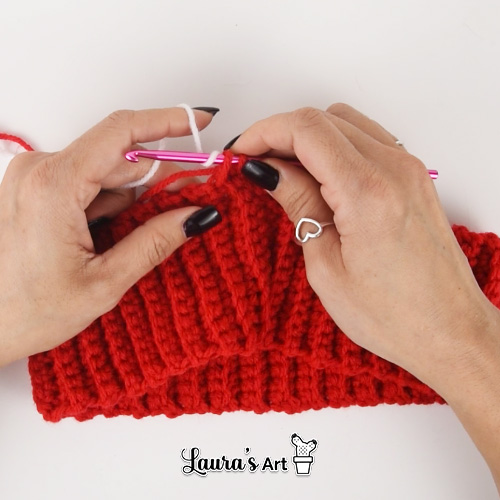
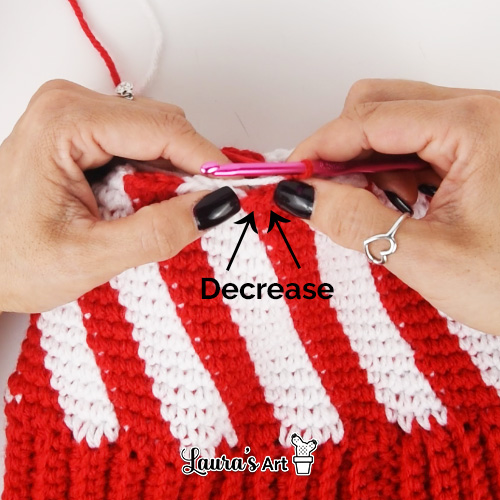
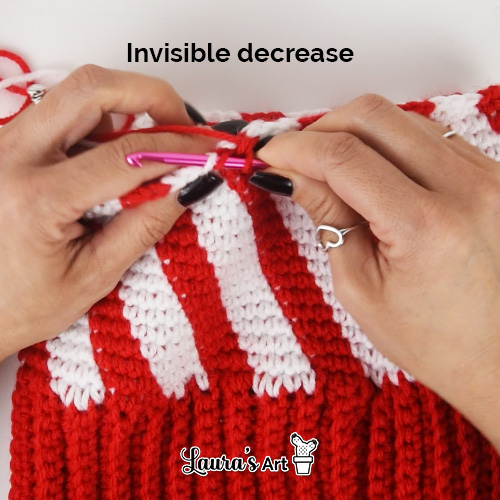
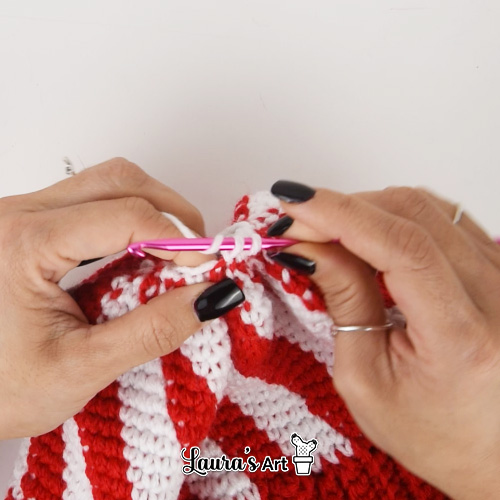
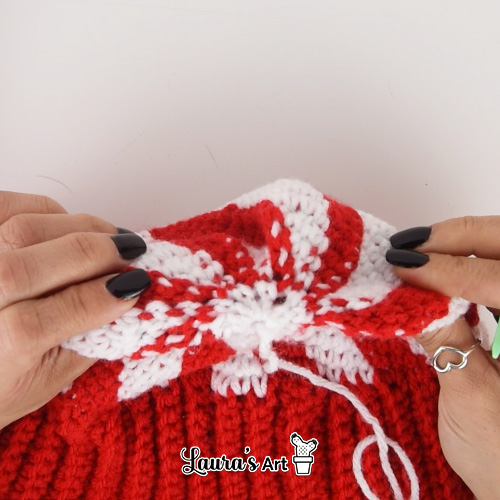
All right, now that you have the desired height of your beanie, we will make 4 rows of decreases.
In the first row of decreases, of the 4 red stitches that you have to make, we are going to make the decrease in the 2 middle stitches, that is to say, you will make 1 red stitch, 1 decrease and 1 red stitch that you finish with the white yarn to make 1 white sc, followed by 1 decrease, 1 white sc that you finish with the red yarn, and continue this sequence until the end of the row.
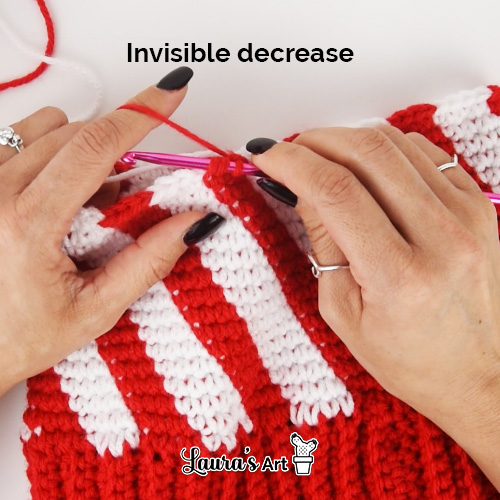
For the second row of decreases, we will make 1 sc in red, and 1 decrease, to be made between 1 red stitch and 1 white stitch of the previous row. This decrease will be finished with the next colour, in this case white. Now we make 1 white sc, and 1 decrease, finishing the decrease with the red yarn, and so on until the end of the row.
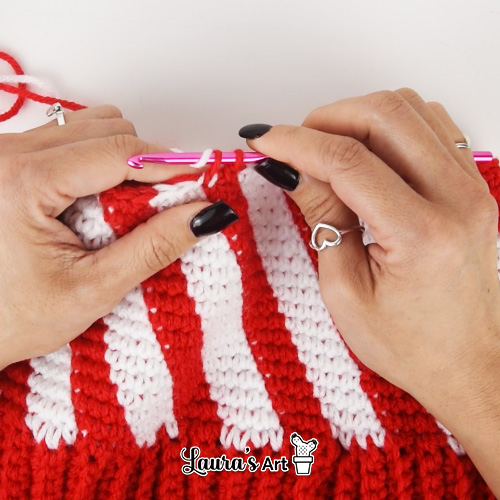
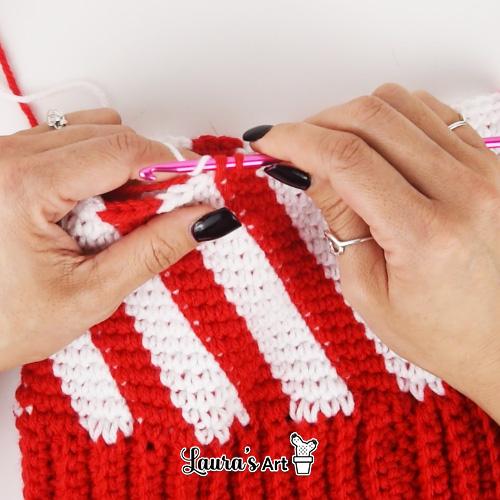
For the third row of decreases, we will make pure decreases, i.e. we start with the red yarn, making a decrease that we will finish with the white yarn, with which we will make a decrease that we will finish with the red yarn. We will continue in this way until the end of the row.
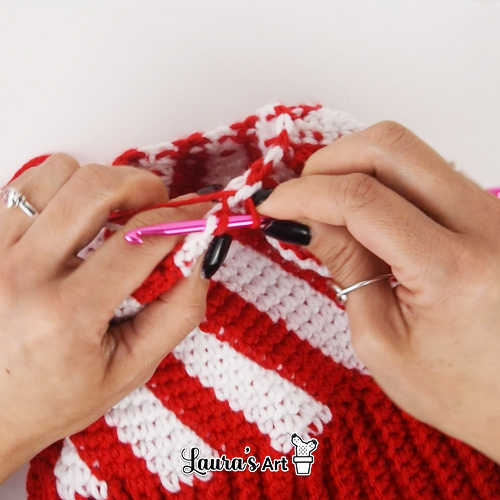
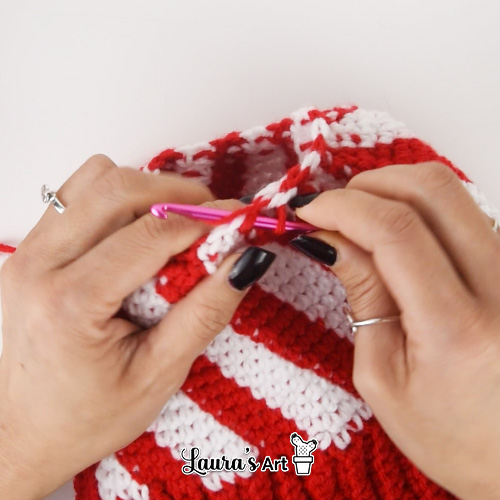
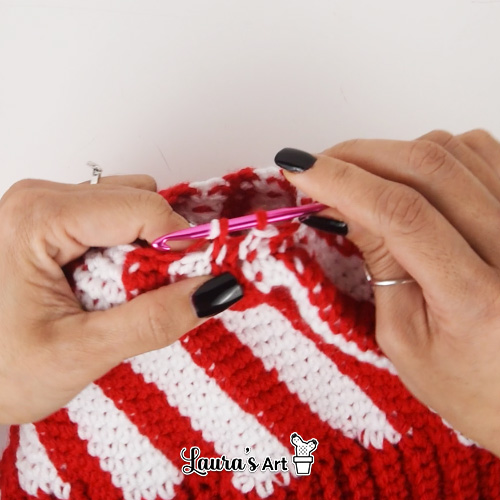
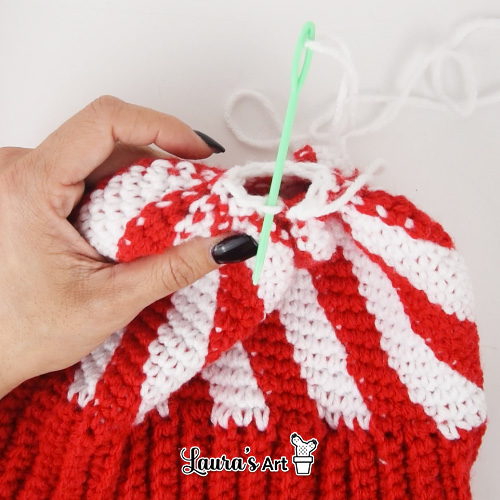
For the last row, you will choose a colour, either white or red, and do the whole row of decreases.
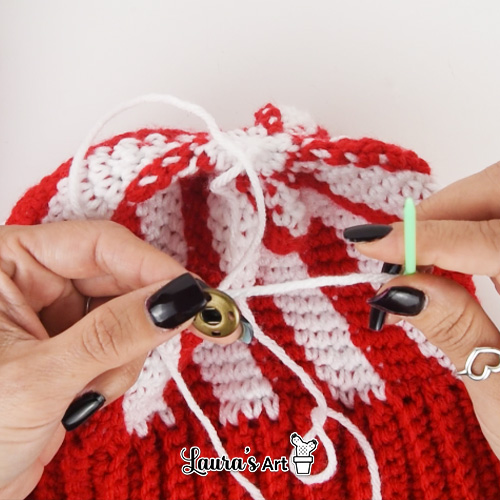
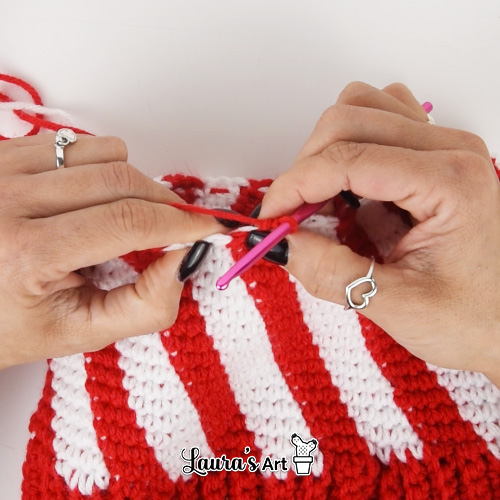
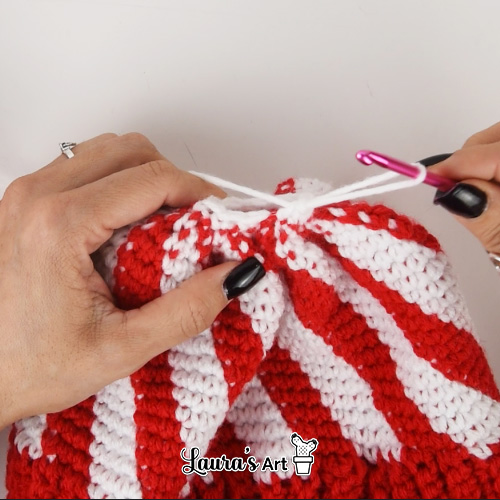
Once you are done, with your darning needle, thread your needle through all the front loops of all your stitches. At the end pull it through and this will close the beanie. Tie a knot to secure the yarn and cut.
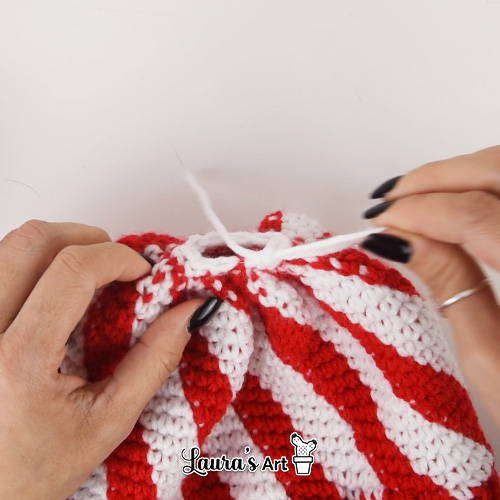

Once your hat is closed, it’s time to put on the pom-pom. You can make one yourself or use one like the one I used, which has clasps. Sew on the brooch and you’re done! Your hat is ready!!!!